For working professionals
For fresh graduates
- Study abroad
More
- Post Graduate Certificate in Data Science & AI (Executive)
- Gen AI Foundations Certificate Program from Microsoft
- Gen AI Mastery Certificate for Data Analysis
- Gen AI Mastery Certificate for Software Development
- Gen AI Mastery Certificate for Managerial Excellence
- Gen AI Mastery Certificate for Content Creation
- Post Graduate Certificate in Product Management from Duke CE
- Human Resource Analytics Course from IIM-K
- Global Master Certificate in Integrated Supply Chain Management
- Gen AI Foundations Certificate Program from Microsoft
- CSM® Certification Training
- CSPO® Certification Training
- PMP® Certification Training
- SAFe® 6.0 Product Owner Product Manager (POPM) Certification
- Post Graduate Certificate in Product Management from Duke CE
- Professional Certificate Program in Cloud Computing and DevOps
- Python Programming Course
- Executive Post Graduate Programme in Software Dev. - Full Stack
- AWS Solutions Architect Training
- AWS Cloud Practitioner Essentials
- AWS Technical Essentials
- The U & AI GenAI Certificate Program from Microsoft
2. jQuery Ajax
3. jQuery CSS
12. Jquery Toggle
14. jQuery html()
20. jQuery Animation
Introduction to jQuery
For everyone willing to learn and get their hands on jQuery, here's your bit! This lesson guide is specifically developed for students who want to learn about front-end web development with jQuery. The most powerful JavaScript streamlines the process of generating interactive and dynamic websites. And also for experts who wish to get a quick recap and equip their skills. This guide will probably take you on various journeys via key ideas, real-world applications, and learning resources.
Overview
The introduction to jQuery tutorial includes a description of its use in web development and how it makes jobs like event handling, animation, and AJAX calls easier. After that, the presentation dives into important subjects like selectors, DOM manipulation, and effects, with thorough explanations and illustrations to aid in understanding.
What is jQuery?
The use of this tool works like a magic brush for developers, experts, beginners, etc. You can do the same on the website with the help of jQuery. This jQuery tutorial for beginners and experts is like a magic wand. So, check it out!
Why Use jQuery?
jQuery in JavaScript is a popular library. You can easily search HTML documents, handle events, animate, and connect with Ajax for faster web development. One major advantage of utilizing jQuery is that it simplifies difficult JavaScript tasks, allowing developers to create interesting and interactive websites without becoming bogged down in lengthy code. But, with jQuery, you can do it easily with a few codes.
In this jQuery example, it simplifies the process of toggling the visibility of the paragraph with just a few lines of code. Plus, jQuery takes care of pesky browser differences, so you can be sure your code behaves the same no matter which browser your visitors are using. This mix of simplicity, flexibility, and reliability makes the jQuery tutorial super handy for all sorts of web projects.
Getting Started with jQuery
Welcome to the world of jQuery, where dynamic and interactive web development begins. Let's begin the jQuery tutorial step-by-step.
1. Setting Up jQuery in Your Project
To utilize jQuery in your project, first include the jQuery library to your HTML code. You can get the jQuery file from the official website or through a Content Delivery Network (CDN) link. Once you have the jQuery file, include it in the <head> section of your HTML file using the <script> tag.
HTML
<!DOCTYPE html>
<html lang="en">
<head>
<meta charset="UTF-8">
<meta name="viewport" content="width=device-width, initial-scale=1.0">
<title>My jQuery Project</title>
<script src="https://code.jQuery.com/jQuery-3.6.0.min.js"></script>
</head>
<body>
<!-- Your HTML content goes here -->
</body>
</html>
2. Understanding the Structure of jQuery Code
jQuery code follows a structured format that starts with selecting elements on the webpage using selectors, followed by applying actions or event handlers to those elements.
$(document).ready(function() {
$("#myElement").text("Hello, jQuery!");
});
In this code, $(document).ready() ensures that the jQuery code runs after the HTML document has fully loaded.
3. Basic Syntax and Selectors in jQuery
jQuery syntax revolves around the use of the dollar sign ($) followed by parentheses containing selectors or functions. Selectors in jQuery allow you to target HTML components based on their IDs, classes, attributes, and other properties.
Selecting elements by ID: $("#myElement")
Selecting elements by class: $(".myClass")
Selecting elements by tag name: $("div")
Selecting elements by attribute: $("[data-id='123']")
jQuery Events
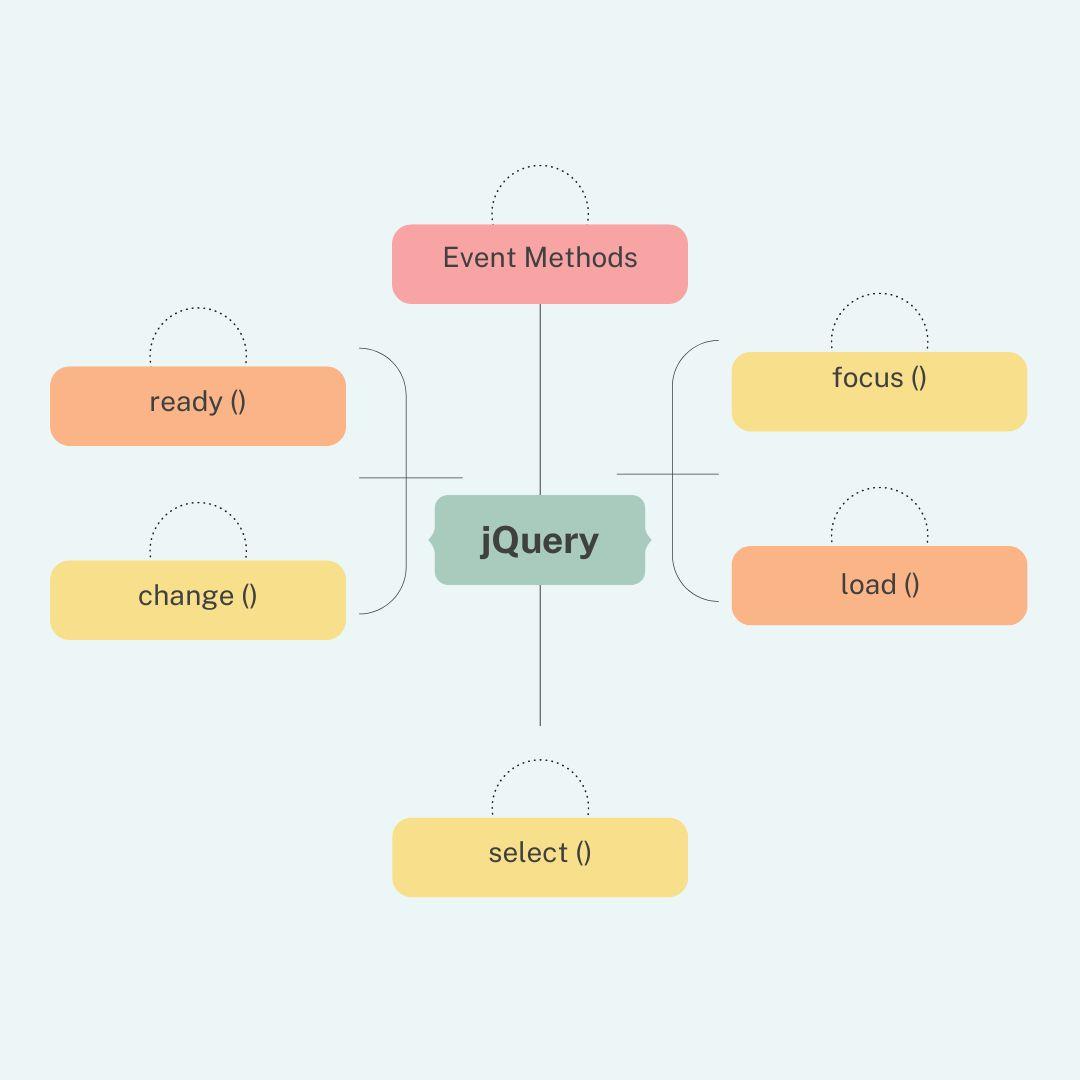
Explore the power of jQuery events and take your web development skills to the next level. Dive into the exciting world of event handling, delegation, and propagation in the jQuery tutorial below!
1. Handling Events Such as Click, Hover, Submit, etc.
In jQuery, events are actions that occur when something happens to an HTML element, like clicking a button, hovering over an image, or submitting a form. Here's how you can handle these events using jQuery:
Click Event:
You can use click() to perform an action when an element is clicked.
For example:
$("button").click(function(){
// Action to perform when button is clicked
});
Hover Event: Use hover() to execute code when the mouse pointer enters or leaves an element. For example:
$("img").hover(function(){
// Action to perform when mouse enters the image
}, function(){
// Action to perform when mouse leaves the image
});
Submit Event: To handle form submissions, use submit() like this:
$("form").submit(function(){
// Action to perform when form is submitted
});
2. Event Delegation and Propagation
Event delegation allows you to attach a single event handler to a parent element, which will then apply to all matching child elements. This is useful for dynamically added elements or improving performance. Here's an example:
$("ul").on("click", "li", function(){
// Action to perform when any li inside ul is clicked
});
Event propagation refers to how events "bubble" up through the DOM tree. By default, events bubble from the target element up to its parent elements. You can stop this propagation using event.stopPropagation().
jQuery Effects and Animations
In this section of our jQuery tutorial, we’re going to talk and understand about the effects and animations. What are those?
1. Adding Animations to Elements
When you want to make your webpage elements more dynamic and engaging, you can use jQuery to add animations. Animations can be applied to various elements such as images, text, or entire sections of your webpage.
2. Fading, Sliding, and Toggling Effects
jQuery provides built-in functions for common effects like fading, sliding, and toggling elements. Fading effects allow you to gradually change the opacity of an element, making it appear or disappear smoothly. Sliding effects can move elements vertically (up or down) or horizontally (left or right) on the webpage.
3. Customizing Animations with Options
jQuery allows you to customize animations using options to control the speed, duration, easing, and other parameters of the animation. Speed options like "slow," "normal," and "fast" determine how quickly the animation occurs.
jQuery Ajax
When you want to fetch data from a server without reloading the entire webpage, Ajax (Asynchronous JavaScript and XML) comes to the rescue. With jQuery, making Ajax requests is straightforward. You use the $.ajax() function or its shorthand methods like $.get() and $.post().
For example, to fetch data from a server using $.ajax(), you can do something like this:
$.ajax({
url: 'https://example.com/api/data',
method: 'GET',
success: function(response) {
// Handle the response data here
},
error: function(xhr, status, error) {
// Handle errors if the request fails
}
});
1. Handling Responses and Updating the DOM
Once the Ajax request is successful, you can handle the response data inside the success callback function. This is where you update the DOM (Document Object Model) with the received data. For instance, you can update a specific <div> element with the fetched data like so:
$.ajax({
url: 'https://example.com/api/data',
method: 'GET',
success: function(response) {
$('#result').html(response); // Update the DOM with response data
},
error: function(xhr, status, error) {
console.log('Error:', error);
}
});
2. Using Ajax for Form Submissions and Data Retrieval
Ajax is also handy for submitting form data without refreshing the page and retrieving data based on user interactions. For form submissions, you can use $.ajax() or the $.post() method. Here's a simple example of form submission using Ajax:
$('#myForm').submit(function(e) {
e.preventDefault(); // Prevent the default form submission
$.post({
url: 'https://example.com/api/form',
data: $(this).serialize(), // Serialize form data
success: function(response) {
// Handle success response
},
error: function(xhr, status, error) {
// Handle errors
}
});
});
jQuery Plugins
jQuery plugins are add-ons or extensions that enhance the functionality of jQuery. They are reusable code modules that you can easily integrate into your web projects to add new features or improve existing ones without writing everything from scratch.
Finding and Integrating Plugins into Your Project
To find jQuery plugins, you can search online on platforms like GitHub, jQuery Plugin Registry, or other developer communities. Once you find a plugin that suits your needs, download or link its script file in your HTML document after including jQuery.
Here's an example of how to integrate a jQuery plugin:
Using jQuery Plugin
<!DOCTYPE html>
<html lang="en">
<head>
<meta charset="UTF-8">
<title>Using jQuery Plugin</title>
<!-- Include jQuery -->
<script src="https://code.jQuery.com/jQuery-3.6.0.min.js"></script>
<!-- Include Plugin Script -->
<script src="path/to/your/plugin.js"></script>
</head>
<body>
<!-- Your HTML Content -->
</body>
</html>
Customizing and Using Plugins Effectively
After integrating a plugin, you can customize its behavior by passing options or parameters. Most plugins come with documentation explaining how to use them effectively.
Best Practices and Tips
Discover the essential best practices and expert tips to enhance your jQuery skills and write efficient, optimized code. Dive into our comprehensive jQuery tutorial to learn the strategies that will take your web development projects to new heights!
Writing Efficient jQuery Code
- Use Efficient Selectors: Instead of selecting elements by tag name or class alone, use more specific selectors like IDs or hierarchical selectors to target elements efficiently.
- Cache jQuery Objects: Store jQuery objects in variables to avoid repeated DOM traversal, which can improve performance, especially in functions that use the same elements multiple times.
- Optimize Event Handling: Use event delegation for dynamic elements or when handling events on a large number of elements. This reduces the number of event handlers attached to the DOM.
- Minimize DOM Manipulation: Batch DOM manipulation operations together using methods like .append(), .prepend(), or .html() instead of multiple individual operations, which can improve performance.
Avoiding Common Pitfalls and Mistakes
- Improper Event Binding: Ensure correct event binding, especially for dynamically added elements, to avoid events not triggering as expected.
- Memory Leaks: Be mindful of memory leaks when using jQuery plugins or closures. Unbind event handlers and release references to unused elements to prevent memory issues.
- Incorrect Use of Asynchronous Operations: Handle asynchronous operations correctly, such as AJAX requests, to avoid issues like race conditions or callback hell.
- Overloading the DOM: Avoid excessive DOM manipulation or adding too many elements at once, as this can lead to sluggish performance, especially on older browsers or devices.
Optimizing Performance with jQuery
- Minify and Concatenate Scripts: Minify and concatenate jQuery scripts along with other JavaScript files to reduce file size and improve loading times.
- Use CDN Hosting: Consider using a Content Delivery Network (CDN) to host jQuery libraries, which can improve loading speed by leveraging cached resources.
- Lazy Loading: Implement lazy loading for elements that are not immediately visible on the page, such as images or heavy content loaded via AJAX, to improve initial page load times.
- Optimize CSS: Optimize CSS styles to reduce rendering time, as jQuery often interacts with CSS properties. Use efficient selectors and avoid unnecessary styles.
Conclusion
Based on today’s jQuery tutorial, you might have understood how it enables you to do cool things with websites without writing a lot of complicated code. You can build color-changing buttons, pop-up messages, and load new material without refreshing the entire page. It's like having some magic tricks under your sleeve to make your website more enjoyable and interactive for visitors. So, if you want to create cool websites without ripping your hair out over code, jQuery is worth looking into!
FAQs
Q: Is it necessary to learn jQuery for Javascript?
A: Learning jQuery is not strictly necessary for JavaScript, but it can greatly enhance your development experience.
Q: What is the use of jQuery basic?
A: jQuery basics cover fundamental concepts like selecting elements in the DOM, manipulating their properties and attributes, handling events, and making AJAX requests.
Q: What Is jQuery best used for?
A: jQuery is best used for tasks such as DOM manipulation, event handling, animations, AJAX interactions, and simplifying cross-browser compatibility issues.
Q: What is the basic need to start with jQuery?
A: To start with jQuery, you need a good understanding of HTML, CSS, and JavaScript basics. jQuery is built on these languages, so a thorough understanding of them is required. You'll also need a text editor and a web browser to test your jQuery code.
Q: Can I use jQuery instead of Javascript?
A: jQuery is built on top of JavaScript, so it is a JavaScript library. However, for more complex JavaScript functionalities, you may still need to write native JavaScript code.
Q: Should I avoid using jQuery?
A: Whether to use jQuery or not depends on your specific project requirements and preferences. While jQuery can speed up development and simplify certain tasks, some developers prefer to work with native JavaScript for better performance or to avoid unnecessary dependencies.

Author


upGrad Learner Support
Talk to our experts. We are available 7 days a week, 9 AM to 12 AM (midnight)
Indian Nationals
1800 210 2020
Foreign Nationals
+918068792934
Disclaimer
1.The above statistics depend on various factors and individual results may vary. Past performance is no guarantee of future results.
2.The student assumes full responsibility for all expenses associated with visas, travel, & related costs. upGrad does not provide any a.